$0.00
KLRDASH INSTALLATION VIDEO
Thank you to Tyler from Everide for a great installation video.
Check out his web page for great reviews and all around dual sport tips and tricks.
HOW TO TRIM YOUR WINDSHIELD
LOADED LOWER DASH INSTALLATION
CAUTION REFER TO YOUR MOTORCYCLE OWNER’S MANUAL AND WIRE DIAGRAM FOR THE APPROPRIATE LOCATION TO WIRE ELECTRONICS ON YOUR MOTORCYCLE.
IF ARE UNCERTAIN REFER TO A PROFESSIONAL MECHANIC TO HELP WITH THE INSTALLATION.

1. LOADED LOWER DASH MOUNTING
- Remove the four 12 mm bolts from the upper fork mounts and discard the cable guides. Your new lower dash will act as a guide for the cables
- Install the lower dash into place by using the same manufactures bolts and retighten
- Remove the gas tank by removing the side shrouds and seat.
NOTICE: The two fuel lines connecting your gas tank to the carburetor.
2. WIRING
- The negative (-) black lead can be wired to any ground source. We recommend to secure the ground onto the right side of the frame. Route the black wire thru the center of the forks. Leave enough slack in the wire for the handle bars to turn properly.
- Route the supply (+) wire thru the center of the forks from the lower dash directly to the positive terminal on the battery.
- Secure the wires with the supplied zip ties. Make sure the wiring is routed in a manner that will be free from heat or abrasion.
- The Positive red wire can be wired to a keyed location or directly to the battery. Included with your loaded lower dash is a switch that will allow you to manually turn all electronics off.
NOTICE: If the lower dash is left on for extended time it will put a small drain on your battery when the motorcycle is not in use. Make sure the power source is shut off when the key is off.

CAUTION: To get extended life out of your new Loaded Lower Dash. Use common sense when charging devices. The dash comes with a 10 amp fuse. The wires can handle Up to 15 Amps even though the wiring can handle larger amp loads. It is up to you what size fuse to use for overload protection. Through experience we have found that purchasing a Plug Type USB is better to use than a permanent plug built into the dash. This allows for more reliability on the road.
We are NOT responsible for any damage to electronic devices or equipment.
© All Rights Reserved KLRDASH
KLR650 GEN 2 RALLY DASH INSTALATION
Complete Kit Includes: 8 – 10 mm x 6 mm bolts / 8- mm Nuts / 2 – 80 mm x 6 mm Bolts / 2 – Well Nuts (already installed on the metal windshield) and Bolts / 2 – Aluminum Spacers / 4 –Washers.
If you are missing any parts please contact klrdash directly at:
Tools Needed: Phillips Screw Driver / 4 mm Allen Key / 10 mm box Wrench
STEP 1
REMOVE YOUR EXISTING WINDSHIELD:
Rove the four screws that hold the windshield in place. Save your existing well nuts. You will be using them for the upper windshield. (If they are old and cracked order replacement well nuts for a total of 4). Your new Gen 2 Rally Dash comes with complete hardware for the kit itself. You will reuse your windshield well nuts and bolts.
STEP 2
INSTALL YOUR METAL WINDSHIELD:
Your windshield was delivered with two well nuts already installed on the metal windshield. These are for ease of installation; make sure they are located on the windshields front two holes.
STEP 3
INSTALL YOUR LOWER RISER BRACKETS:
Each riser is labeled (brake side upper & brake side lower and clutch side upper & clutch side lower) for easy installation. Install the lower riser brackets first onto the faring of the bike along with the metal windshield. Using the bolts provided for the well nuts and two 10 mm x 6 mm bolts and nuts for the upper holes of the lower risers. Tighten all screws and bolts.
STEP 4
UPPER DASH PLATE:
You will notice the bolt tabs on the metal windshield. Slowly bend the tabs straight up to meet with the upper dash. Remove the existing 6 mm nuts on the dash with an allen wrench. Install the dash plate with the 6mm x 80mm bolt by installing the washer first onto the bolt. Followed by the dash plate, then install another washer followed by the spacer provided. Install the bolt 10mm x 6mm nuts and bolts provided. Tighten all bolts.
STEP 5
INSTALL UPPER BRACKETS:
Install (brake side upper and clutch side upper) brackets directly to your windshield using your existing well nuts or new well nuts that were ordered. Leave the bolts loose on the windshield and slip the upper brackets over the lower bracket already mounted on the bike. Using the provided 10 mm x 6 mm bolts. Tighten all the bolts randomly so that you will apply even pressure to the brackets and windshield as you tighten. Remember each manufacture have slightly different angles to their windshields.
BACKREST INSTRUCTIONS
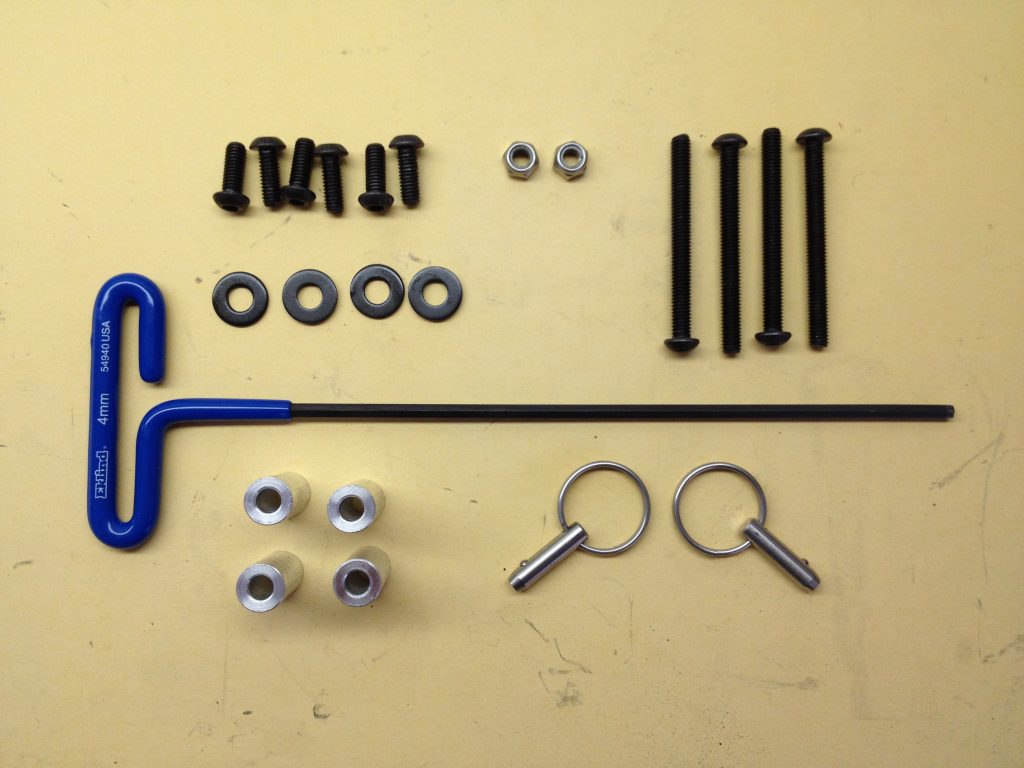
Your hardware kit includes the following:
1. 4 mm x 9 inch hex wrench
2. 6 – 6 mm bolts (Short)
3. 2 – 6 mm nylon locking nuts
4. 4 – 6 mm bolts (Long)
5. 4 – Washers
6. 4 – Aluminum Spacers
7. 2 – Quick Release Pins
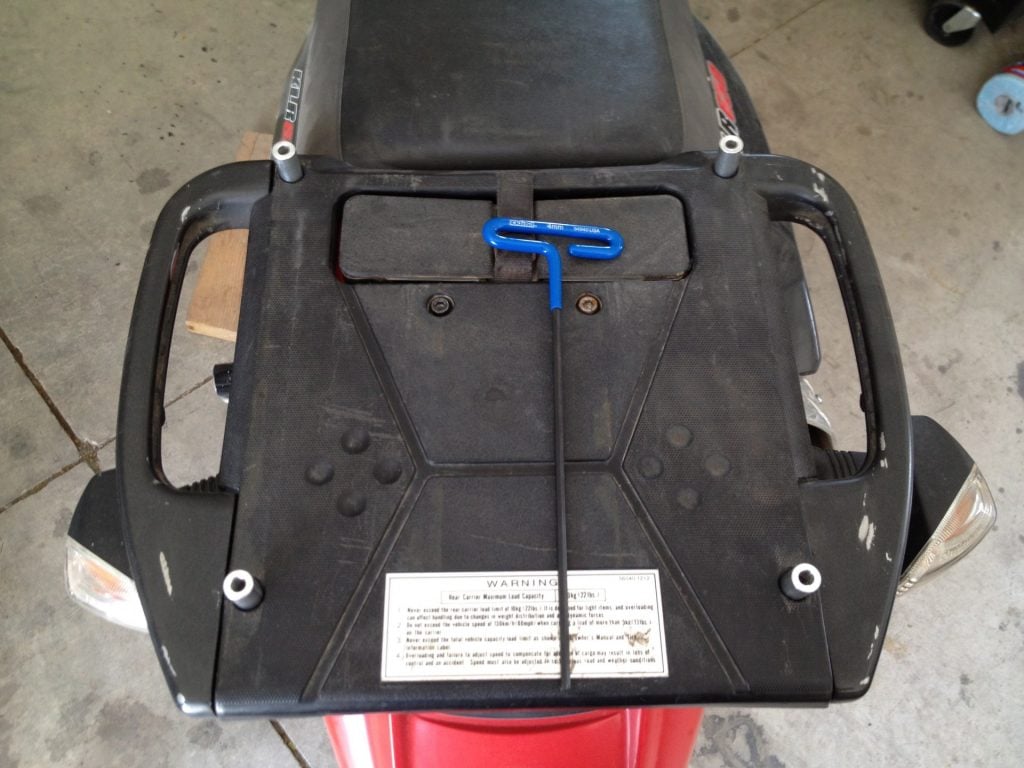
STEP 1:
a. Remove the four existing perimeter bolts on your plastic cargo rack.
b. Leave the two bolts directly behind the tool carrier
c. Discard the factory bolts
d. Leave the factory pressed in aluminum spacers on the factory cargo rack.
e. Install 4 new spacers provided
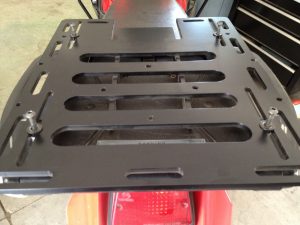
STEP 2:
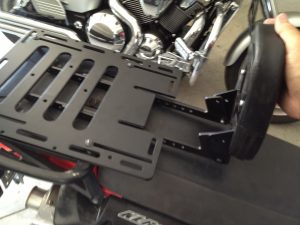
a. Install new aluminum Cargo Rack
b. Align holes
c. Install 4 – Long 6 mm bolt and Washers
d. Thread bolts but do not tighten
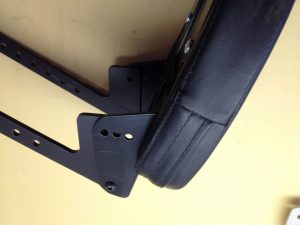
STEP 3:
a. Install sliders to the back rest plate.
b. Notice sliders are mounted inside the angle back plate
c. Use 2 – 6 mm short bolts and 2 – nylon locking nuts
d. Tighten bolts to allow the back rest to tilt forward
and back.
STEP 4:
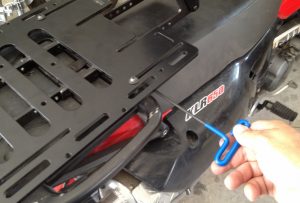
a. Install backrest and slider into place
STEP 5:
a. Tighten slider using 4 – 6 mm bolts
b. WARNING…DO NOT OVER TIGHTEN
ALUMINUM THREADS!
c. For solo rider adjust cargo rack to the forward
position, using less slider
STEP 6:
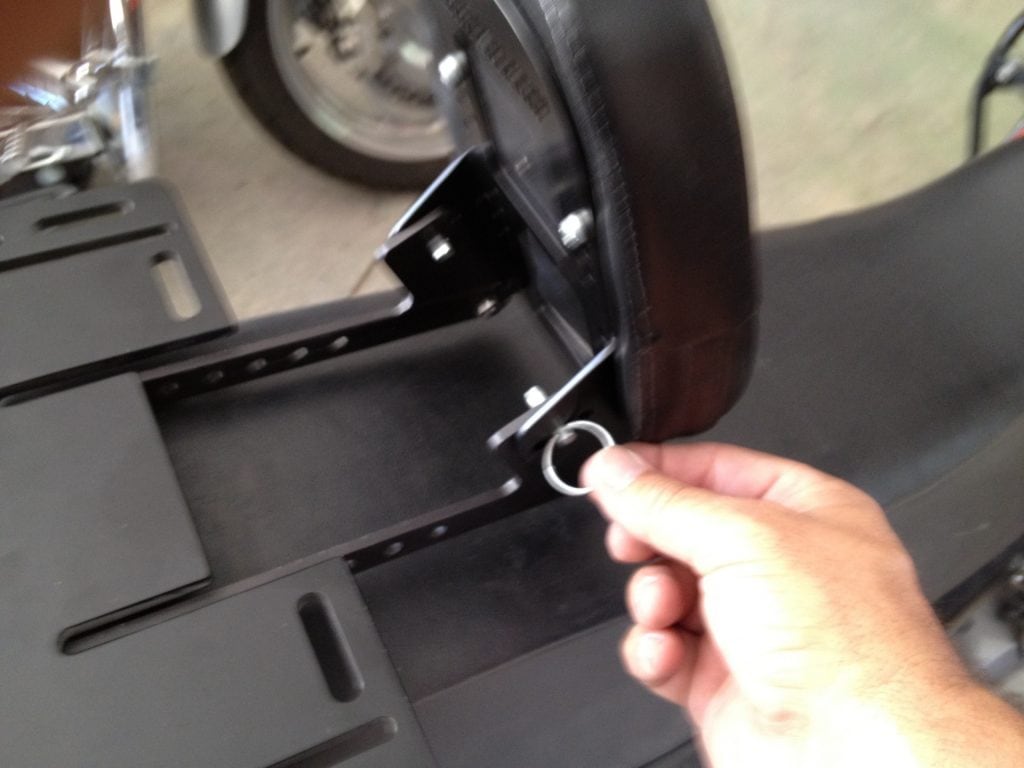
a. Install quick release pins. Start at the middle
setting. (this is the most popular setting)
b. At this point its time to fit the back rest to your desired comfort.
c. Tighten cargo rack bolts
ENJOY!
Return & Exchange Policy
If you are not satisfied with your order, please return it in its original condition within 30 days for exchange or refund.
Customers are responsible for return shipping charges Shipping and handling charges are nonrefundable. 20% restocking fee will be charged.
If the part is received in defective or damaged condition, please return immediately. We’ll send you replacement ASAP.
We always stand behind all products we sell. Your satisfaction is our primary concern If you have any questions or issues, please feel free to contact us via email. We will try our best to resolve any problem(s).